Sunday 17 July 2016

The Marimba is ready

The resonator tubes were finally mounted today. A stiff wire with a loop was used to hang each tube beneath the bar. This makes maintenance and adjustment very easy!
The view from above shows  the two "alternative" suspension methods: Rubber foam feet for the bars, stiff wire for the tubes.


Here is a closup. The loop of the wire stabilizes the bar and prevents swinging. At the bottom of the tube, the wax can be seen.
 The resonator tubes form a nice arc.


Here it is!
:) :) :) The sound is really cool now, it definitely sounds like a marimba :) :) :)

Saturday 14 May 2016

How to tune a resonance tube with wax


Here's a little video on how to tune a resonator tube using wax.

Monday 9 May 2016

Cutting...grey flakes.

This afternoon saw the resonator tubes cut to length. Only point to note was that I had to use the length one semitone up compared to the lengths stated in Jim's description (e.g., length for c used for c#). One reason for this is the tuning frequency of 443Hz, and the other is my plan to use wax inside the tube (shortening the tube to pitch) whereas Jim uses a cap on the outside (lengthening the tube to pitch).

So here they are:

Next steps: Bevel the ends and paint in piano black.

Stay in l/4 resonance ;)

Thursday 5 May 2016

On a budget? - Take spruce!

Just for fun, I made a bar usingf spruce, at a4=443Hz. I knew from my first experiments with the router that the spruce bars sounded very nice, even better than birch. So if you're on a budget, you can very well take spruce IMHO. It should be dry, and of decent quality, with few (if any) knotwholes.

Here is the complete process of cutting and tuning the bar in pictures. It took about an hour to complete the bar.

 This is the raw bar, cut to length. I did not adjust the length to the lower density of the spruce; if you're planning to build an instrument, I'd recommend adapting the thickness. The length of the bar should be aligned with the grain of the spruce.
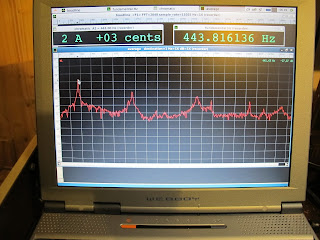
 The piece of wood has its fundamental at almost and octave higher.
 After bevelling the top lengths of the bar and sanding, the measurment shows little change.
 Hey, haven't seen you in a while, Robo Router ;). At the first cut, I (impatiently!!!) removed 6mm deep of wood....
 ...which was already too much for the second overtone! The fundamental is at Eb, way above target.
 The 2nd overtone at 2 octaves above (4 * 443 = 1772HZ) is already too low. That's why you should not be impatient when tuning marimba bars!
 There is a third overtone, but I do not intend to tune this bar at the third overtone.
 Again, Bork's diagram is a great help to decide where to remove material.
 First, some material influencing the fundamental only was removed.
 After some more iterations of removing material (<10), the fundamental is spot on.
 Fundamental at 443,
 second overtone too low at G#, which will result in a "tingling" sound;
 third overtone somewhere, I don't care ;).

The shape of the grooves can clearly be seen against the background of the screen.

The sound is mellow, with a relatively short decay time compared to the Padouk bars. But for a little 1 octave, maybe pentatonic instrument on a budget, mounted over a box resonator, the sound is definitely all right!

Monday 18 April 2016

Tuning the tubes...with wax!

Hello World,

it has been a while since there was activity here - today, I've tested an idea on how to tune the resonator tubes without glue, caps, sanding and all that other mechanical hassle.

The idea is simple: Pour some liquid into the half-closed tube to change its resonating frequency and create an airtight seal. This works exceptionally well, try it with a trekking water bottle and hum into it while adding water. But I don't want to grow flowers in the marimba, also water evaporates rather quickly...so what else is there: engine oil (probably works, but stinks), cooking oil (gets sour and stinks), epoxy raisin (one hell to work with), hmmm, sticky and sealing - yes! It will be candle WAX.

OK, here's what I did:
  1. Cut the tube to the specified length (it's a lambda/4 resonator).
  2. Grind the edges to be smooth.
  3. Put a deep freeze satchet over one end, fix with rubber rings.
  4. Melt some candle wax.
  5. Pour into tube until frequency is ok.
  6. Let cool and harden.
  7. Gently remove deep freeze satchet.
  8. Done!
The resonating frequency is best measured by tapping the whole tube gently on the floor, this excites the fundamental resonance frequency of the tube clear enough for a tuner to hear it. Tapping on the side excites a lot of other frequencies as well, which might irritate a tuner. The resulting sound of the marimba with a resonant tube is really cool!

Questions for now:
  • Is the wax sticky enough to stay in place?
  • When completely cooled down to room temperature, does it shrink?
  • Does the heat from the molten wax disturb the tuning in a relevant way?

This is what it looks like:
 That's the tube for the middle C. It is a sewage tube.
 That is the bottom view of the tube. The wax nicely seals the tube. The indentations of the deep freeze satchet can clearly be seen, but this does not matter on the outside.

 This is the inside view of the bottom of the tube. The wide angle lens makes it look like a ball, but in fact it is a totally flat surface.

Stay tuned and in resonance! Maybe I'll do a video about the whole process, it is really fun. And of course, some proper sound samples must be done!